I recently decided to upgrade my home environment monitoring. I wanted a single device that could handle temperature, air quality, and reliable human presence detection, all housed in a case that fit the aesthetic of my lab.
The result is what I’m calling the “Minirack Sensor.” It is a custom ESPHome-based node built on an ESP8266 NodeMCU v2.
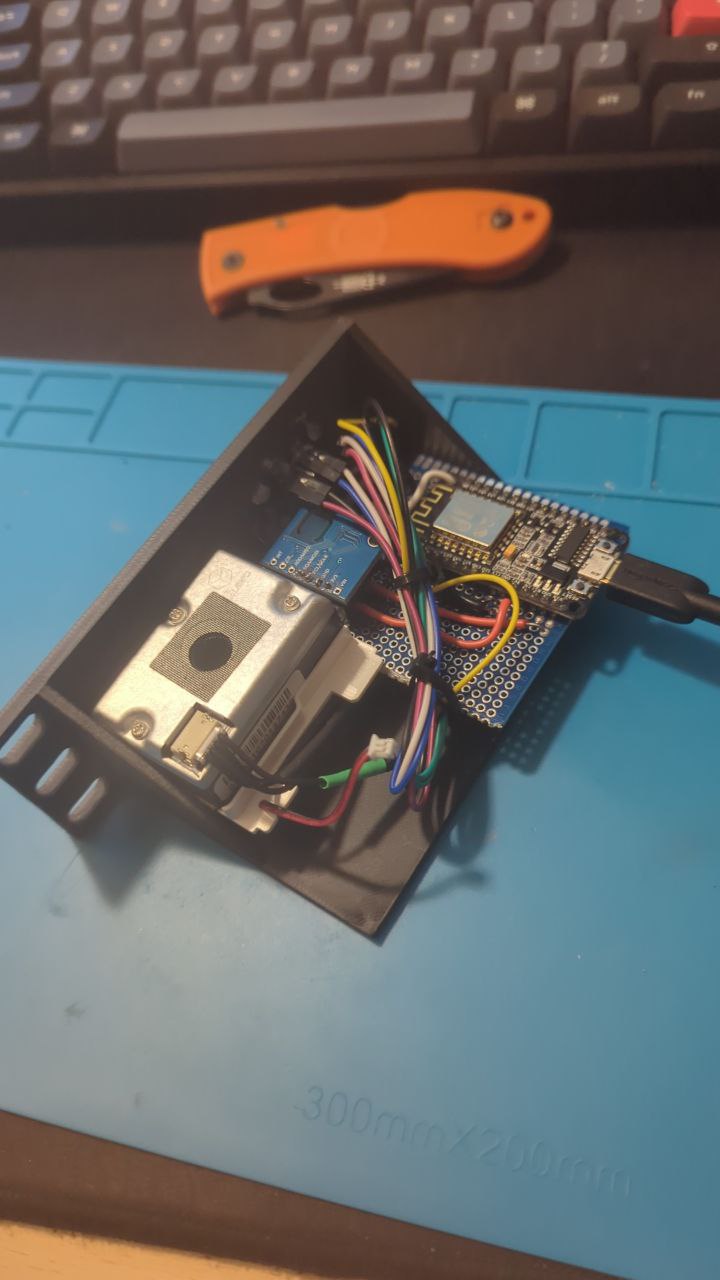
The Hardware Stack
I chose specific components to cover as many metrics as possible without overcrowding the enclosure:
- Controller: NodeMCU v2 (ESP8266). It’s inexpensive and has just enough pins for this setup.
- Presence: HLK-LD2410C. I switched to mmWave radar because standard PIR sensors are frustratingly bad at detecting someone sitting still at a desk. The LD2410 solves this completely.
- Particulates: PM1006. This is an LED-based sensor with an integrated fan for active airflow, monitoring PM2.5 levels. This sensor can be easily obtained from a IKEA VINDRIKTNING, read this article for more info.
- Environment: AHT21 + ENS160. A combo module that handles Temperature, Humidity, CO2 (equivalent), and TVOCs.
The Technical Challenge: UART Conflicts
The main hurdle in this build was managing the communication between the ESP8266 and the radar. The HLK-LD2410C defaults to a baud rate of 256,000, which is too fast for the ESP8266’s software serial implementation to handle reliably.
To fix this, I had to manually reconfigure the radar to 38,400 baud using the manufacturer’s Bluetooth app.
The Enclosure
I didn’t want a breadboard sitting on my shelf, so I designed a custom enclosure in Onshape. It’s a “minirack” style case designed to be printed in PLA or PETG. It allows for airflow to the PM1006 fan while keeping the heat from the ESP chip away from the temperature sensor as much as possible.
Software and Integration
The device runs on ESPHome. While it integrates natively with Home Assistant, I included a local web server in the configuration. This means the device is standalone; you can view live metrics just by visiting its IP address in a browser, which is useful for debugging or if my Home Assistant instance goes down.
Files and Source
I have open-sourced the wiring diagram, the complete YAML configuration, and the 3D model files. You can find everything in the repository below.